Table of Contents
Group Name Defined
The Group Name is the same as the Card Group and comprises the Record Properties and Record Manager sections and icons.
Record Properties is used to set up a Card Group by defining the properties and settings. However, there is Record Manager functionality within the Record Properties section, and it is strongly recommended to manage card records in the Record Manager section. The Record Properties section is covered within this section of the user manual.
The Record Manager section creates, manages, and prints card records and displays the Record Properties for view-only purposes. See the Record Manager section of the manual for details.
Data Management Navigation
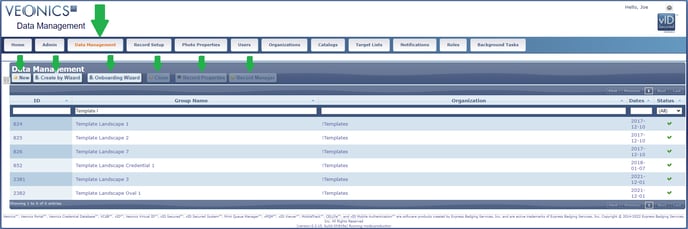
If user rights are assigned, the Data Management tab will be displayed. Highlight a Group Name via left-mouse click, and then select the Record Properties icon. If there is no applicable Group Name, select the New icon.
If the published Group Name list is too long, use the fields under the header to search. Start typing the name, and the list will auto-filter. When pasting into this field, use the Back key to erase a character or two, for the filter to recognize the entry and filter correctly.
The view of all Card Groups may be filtered, showing only Active groups. Selecting the opposite-facing arrows in the upper left screen margin will open a filter option screen allowing the filtering of groups by:
- Organization - Enter a name
- Group Name - Enter a name
- Date Range - Enter From: - To: range
- Status
- New
- Ready
- Locked
- Inactive
New
If there is no Card Group listed to Edit or Duplicate, then, select the New icon, and create a new Record Property. Upon saving a New Record Property, it will be placed in an Active state. See Record Properties below for more information regarding completing the section.
Create by Wizard
When using an exported list or other created list (save Excel files as text delimited), select the Create by Wizard tab, and follow the instructions to:
- Upload File
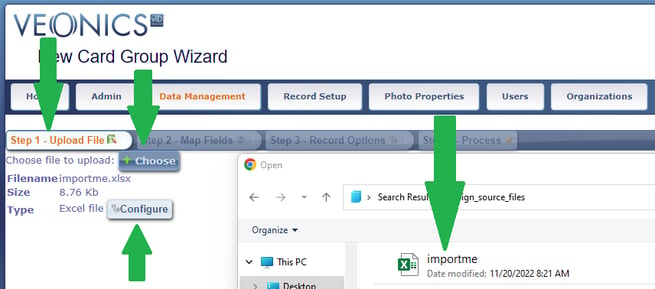
- In Upload File, Select the Choose icon to navigate the source data file, then select the Open icon in the lower right corner of the browser
- Select the Configure icon to select the correct File Format
- File
- Database Connection
- Web Service
- Select the Next icon on the far top right of the browser
- Map Fields
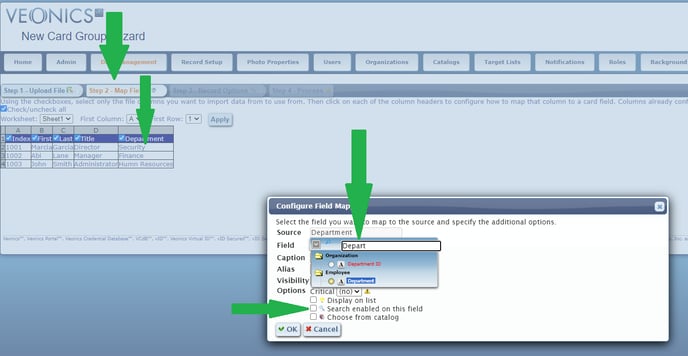
- Even though the field headers have blue check marks and no red "X', select each header and map to the correct field by selecting the header name via left-mouse click, assigning the Field from preassigned fields by typing the name and selecting from the list, and then editing the Caption name if needed
- Record Options
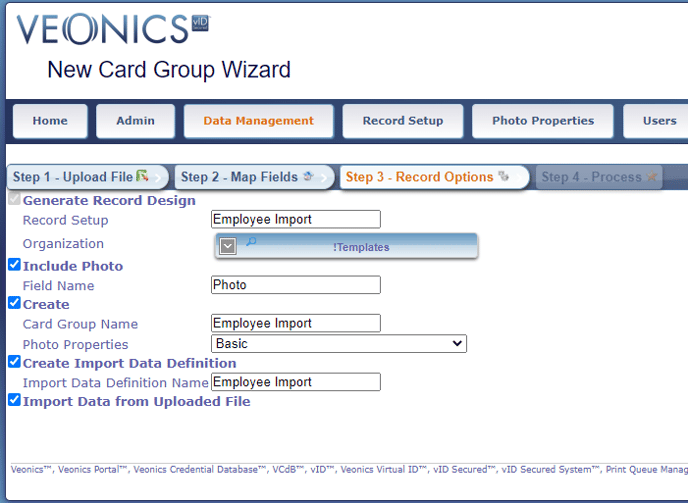 Generate Record Design
- Record Setup - Assign a Unique name
- Organization - Select from the published list
- Include Photo
- Field Name - Enter the name of the Photo name field in the import file
-
- Create
- Card Group Name - Assign a Unique name
- Photo Properties - Select from the published list
- Create Import Data Definition
- Import Data Definition Name - Assign a Unique name
- Import Data from Uploaded File - Selecting Next automatically starts the Create process
- Create
- Process
- Selecting Next automatically starts the Create process
- Go to Record Properties
- Then go to the newly created Record Properties, and edit as needed.
Onboarding Wizard
The Onboarding Wizard is designed so an end-user can create a functional Card Properties configuration from scratch to include: User, Organization, Card Template, and Record Properties set up, in a single process. Start by selecting the Onboarding Wizard icon.
This feature has not been enabled for Customer Use, yet, and is pending the completion of a New Customer accessible Portal link.
Contact Information
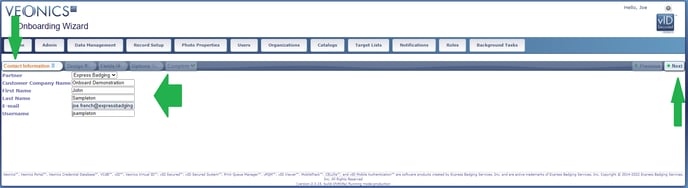
- Partner is auto-assigned in the backend during setup.
- Customer Company Name is entered and must be unique
- First Name is entered for the system User
- Last Name is entered for the system User
- E-mail is entered for the system User
- Username is auto-generated and can be edited before continuing
- Select the Next Icon on the far right side of the browser
Design
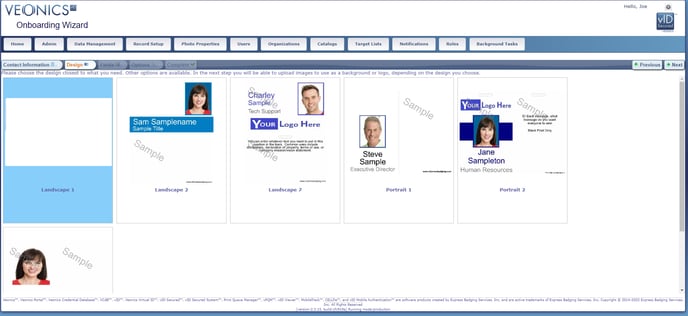
In this section, several Template Designs are available to Clone to use or as a starting reference, however, several Templates have been overwritten and need reverting.
- Select a Template then the Next icon to continue
Fields
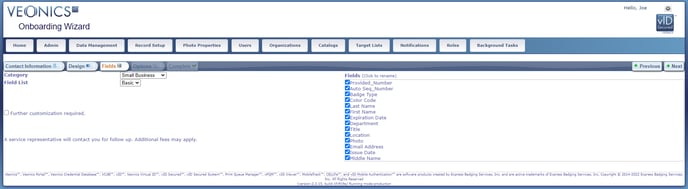
Here is where the Record Set Up is created by selecting what is needed to manage the Card Group in Record Management.
- Edit as needed then select the Next icon to continue
Options
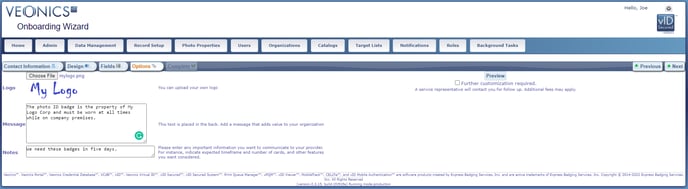
The Options section provides the opportunity for a customer to
- Upload a Logo for the front side
- Entered text in Messages that is printed on the backside of the badge
- Enter any needed project comments in Notes
- If further edits are required, a request to be contacted can be enabled by checking the box.
- Edit as needed then select the Next icon to continue
Complete
Once Options are completed, and the Next icon is selected, the User, Organization, Card Template, and Record Properties are created.
Clone
When creating a new Record Properties, it may save time to use an existing one by duplicating it and then editing the properties for the new Record Properties. After selecting a Record Properties via left-mouse click, select the Clone icon, provide a New Card Group Name, and start editing as needed. See the below section for editing details.