Table of Contents
Record Manager
Record Manager
Navigation
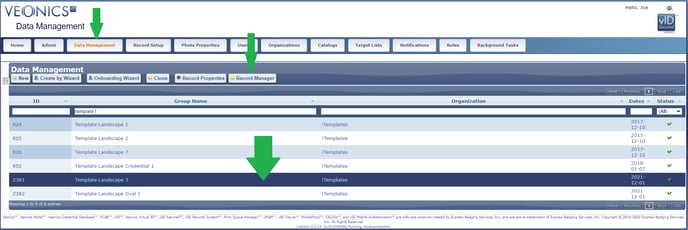
When more than one Card Group (Group Name) is assigned to a user, a list of groups will be listed where one must be highlighted via left mouse click and then opened by selecting the Record Manager icon.
From the Data Management page, other user-assigned features are available (New, Create by Wizard, Onboarding Wizard, Clone, and Record Properties), and we do not recommend using them unless managing/editing property settings as this is an advanced section.
If only one Card Group is assigned to a user, and when the Data Management tab is selected, the Record Manager will open up.
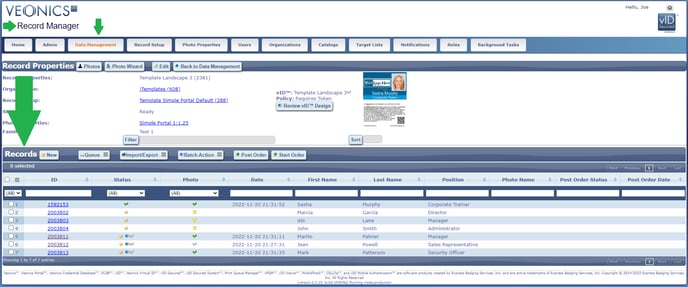
Once in the Record Manager, the Record Properties are displayed (view only purposes) along with the sample Design Template image that represents the ID card to be printed or one of the designs if different designs are printed via design logic from the same template.
The Filter icon can be used to create a record filter by selecting the icon and then building a filter logic statement. Field=[field to search], then Operator= [conditional operator], then Value =[field related content]. Multiple statements can be built as well. Then select OK to save and continue, which will publish the list view as defined in the filter settings. To clear the filter, select the Filter icon, select Clear, then OK.
Create New Records
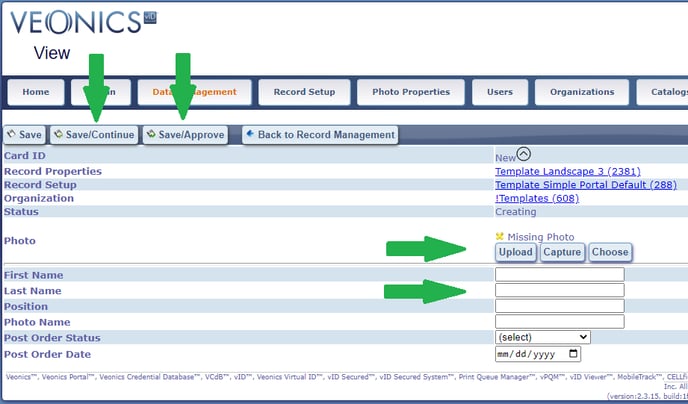
- Select the New icon to create new ID Records
- Enter related data or select an entry from the drop-down catalog list when applicable
- Select Save/Continue
- Upload, Capture or Choose a photo
- Upload allows users to map photo images from the PC to network
- Capture allows users to live capture photos using a connected webcam or using a mobile device camera
- Choose allows users to map to photos saved on the Veonics Portal
- Crop and Validate/Accept the photo (See Below)
- Select the GerateGenerate Token icon to preview the virtual ID badge
- Once in a printable state, select either Save/Approve or Save icons
Photo Validation - Crop and Approve Process
Pan/Zoom Tools
- The Arrow icon set allows users to nudge the photo in up/down or left/right directions
- The Magnifying Glasses allow users to enlarge or reduce photo images
- The Bidirectional arrow icon is the View Full Image feature that positions the image based on top and left margins
Alignment Tools - Left to Right
Always START with the far right Face Recognition alignment tool icon (see below)
- The Mark Top of Head and Mark Chin icons (rarely used)
- Select the Mark Top of Head icon, then select the top of the forehead within the image
- Then select the Mark Chin icon, then the bottom of the chin within the image, and then the face snaps to fill the inner defined circle/oval height
- The image may still need to be centered vertically, and its easiest to move it via left mouse click-hold and drag to position
- The Mark Eye Line Center and Center Horizontally icons (rarely used)
- Select the Mark Eye Line icon, then the eye line within the image
- Select the Center Horizontally icon, and then the face snaps to the center of the inner defined circle/oval but does not change size
- Select the All Points to Cross icon, then the point of the image that should be centered around it
- Select the Photo Area region icon that is set to the image crop attribute, then using the mouse left click-hold to define the resize area to automatically fit exactly
- START HERE and select the Face Recognition icon to automatically snap the image to fill the oval
Image Enhancement Tools
- The Image Filter icon
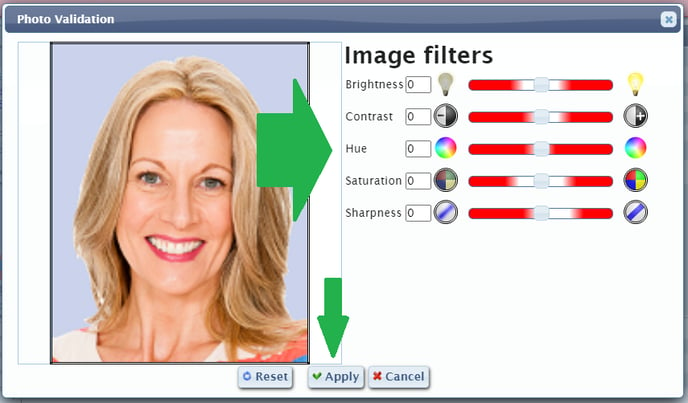
- Use this tool to fix and save photos that may otherwise be rejected or unable to be used because they are too blurry, dark, light, require color adjustment, or is pixelated
- It is strongly recommended that the user align and crop the image before trying to apply any image filters to enhance it
- Adjustments to improve image quality
- Brightness
- Contrast
- Hue
- Saturation
- Sharpness
- Changes are previewed in real-time on the image sample
- When satisfied, click Apply, and they will get applied to the source image
- Red Eye Reduction icon
- It is strongly recommended that the user align and crop the image before trying to apply any image filters to enhance it
- Then select the Red Eye Reduction icon
- Select the Left Side red eye icon, and using the mouse left click-hold to cover the iris portion of the eye to be adjusted
- Repeat on the right eye using the Right Side icon
- Select the Preview icon to review
- Select the Apply icon to accept; otherwise, Cancel
- Rotate counter-clockwise by selecting the far right icon, and repeat as needed
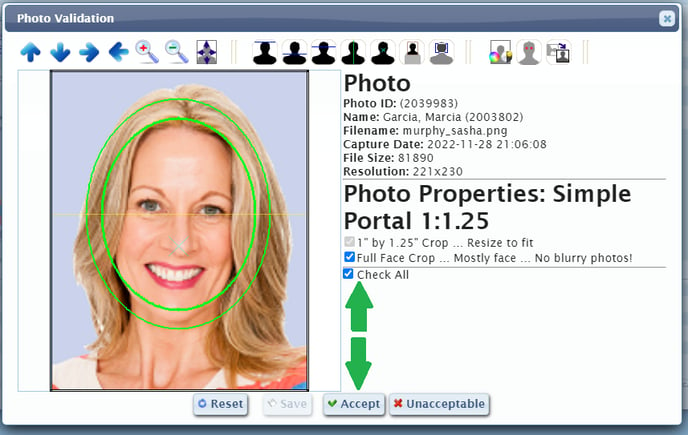
- Photo lists the image properties and are displayed for information and reference only
- Photo ID: Internal number assigned to the source image
- Name: Record Name assigned
- Filename: internal file name.jpg
- Capture Date: Date and Time of capture
- Resolution: Attributes of Width and Height pixel dimensions
- Photo Properties list the select Photo Validation setting and the related validation topics that define a correctly validated photo. These settings are defined in the Photo Properties icon found on the Header icon banner. Properties to consider:
- 75% Full Face Crop
- Solid Backdrop, no outdoor images
- No head ware allowed
- No scarves or flashy jewelry allowed
- Professional Image
- No image enhancements
- Not too dark or light
- Select Reset to start over
- Select Save to save changes, but not Accept
- Select Accept to save and accept changes, placing the photo in a Validated state
- Select Unacceptable
- If an email address is previously entered/saved in the record, a Veonics CELLfie(tm) rejection email will be sent requesting and new photo be uploaded
- If an email address does not exist, the new photo capture/request must be managed separately, saved upon receipt, uploaded, and validated manually
Manage Existing Records

- Previous - Returns to the previous record
- Next - Moves to the next record
- Goto - Goes to the record number count value entered
- Edit - Places the record in edit mode
- Approve - places the record in the Approved state for use or printing
- Once Approved, other options are available
- Deactivate - places the record in a Deactive state
- Reissue - duplicates the record for new issuance once deactivated
- Reactive - revert the record to an Active state
- Reopen - revert the record to an un-Approved state
- Delete - deletes the record permanently and may be unavailable based on previous states
- Deactivate - places the record in a Deactive state
- Once Approved, other options are available
-
- Mark as Printed - places the record in a printed state (rarely used)
- Mark as Shipped - Places the record in a Shipped State and is used when managing printing and shipping of many records where the status of Printed is not helpful in tracking
- Mark as Lost or Stolen - places the record in an inactive state and marked as Lost
- If the vID barcode was printed on the physical ID badge, upon scanning it when presented, the card status would be clearly stated on the Veonics Virtual ID URL on the mobile device or PC. If marked as Lost or Stolen, it should be retained, as it is marked as a secondary ID. If marked as Stolen, this is a higher security level, and the presenter themselves may be of interest.
- Mark as Printed - places the record in a printed state (rarely used)
-
-
- Reprint - If allowed, the card record can be reprinted and is tracked in the History tab of the ID record
- Send to Queue - opens a dialog box to select a user-accessible queue to send print jobs too
- Examples include: Human Resources, Security, Student Services, North Campus, and South Campus, allowing for print job distribution management and accountability
-
- Back to Record Management - returns the user to the main Record Management section, where all records are viewable in a list format
- Select the New icon to create new ID Records
- Proof Design - Select this option to convert the Record into a sample Proof Design for approval management
- Record Properties History - Select this icon to display all breadcrumb audits trail actions by user, date, and time
- vID Options - The Veonics Virtual ID hyperlink and the Record three options
- PDF - Downloads a PDF image of the Front/B ack of badge to users Download folder
- Front -Downloads a jpg image of the Front of badge to users Download folder
- Back -Downloads a jpg image of the Back of badge to users Download folder
Print Queue Management
- Send to Queue - Places all selected records available for printing into the selected queue
- It is recommended to have a "Location" field that relates to the print queue, so it can be used to refine the filter by the preferred queue for batch printing
- Remove from Queue - After selecting records that are in an Enqueue state, they can be removed by selecting this feature
- Hold in Queue - Once a record is placed in an Enqueue state, it can be placed on hold after selecting it and then Hold in Queue. It will appear in the list of Enqueue records but will not be printed until Send to Queue takes it out of this state.
Import/Export
This feature allows the user to upload data files using existing Import Data Definitions
Export Records
Select this option to export an Excel Template along with selected records/data that can be provided to users who need it.
Export Photos
Import
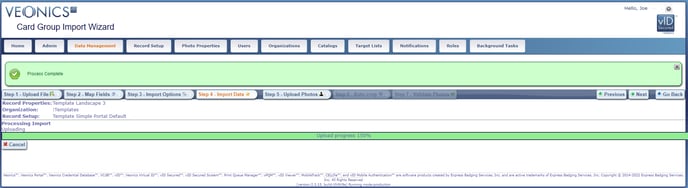
Import Wizard
This feature walks users through the steps to import data: create/save data definitions, and
- Upload File - Select the data file to import and it should not include any fields that are not being imported, and if Data Definitions have been previously saved, they can be assigned here, eliminating the Map Fields and Import Options steps
- Map Fields - Map the fields by selecting the red X, then mapping to the correct fields, and if fields are named exactly as in Data Setep, they should auto-link
- Import Options - Save the Data Definitions here
- Import Data - Uploads the data with success bar
- Upload Photos - Optionally, if the photos are in a state to import, they can be select and merged with the records here
- Auto-Crop - Once imported, they can be auto-cropped to correct attributes
- Validate Photos - Cropped photos can them be validated/approved for use in printing
Upload Data
Once Data Definitions have been saved, new imports can be uploaded here, assuming the import columns are the same and the saved Data Definitions are valid. Photos can not be assigned using this option.
Record Batch Actions
- Approve
- Deactivate
- Mark As Printed
- Mark As Shipped
- Mark as Lost
- Mark as Stolen
- Re-Pring
- Reissue
- Mark as Received
- Mark as Not Received
- Re-Open
- Reactivate
- Delete
- Move
- Proof vID
- Update Fields
Post Order
Start Order