Jump to:
- Post Order / Ordered Status
- Reprints of badges in 'Printed' status
- Confirmation / Checking order status / Turnaround time
Create and Approve new badge records for printing
- After logging into Veonics, from Home Page - click on
 in the upper-left corner of page to access your organizations badge records.
- In Record Manager -
- Click
 button to begin creating new badge
 - Upload photo using
 button and click
  to locate photo on your PC
 - Enter all badge holder information into text fields
- Click

- Click

- Return to first step for multiple badges
- Click
 to return to Record Manager when finished
 - The order is now ready to be sent to us via Post Order
Reprinting a badge
Printed Badges must be Re-approved via Reprint button, and then Ordered via Post Order button
Single record -
- In Record Manager -
- Search for badge record that needs to be reprinted
- If badge record needs to be updated/edited -
- Click the ID number hyperlink on the left to open badge record
-

- Click

- Make changes as needed,
- Replace photo (if necessary) by clicking on
 , then click the
  icon (browse for photo on your PC).
- Click
-
- Click the ID number hyperlink on the left to open badge record
-
- Click

- Click
- Click
 to place record into Approved status.
 - Click to return to Record Manager
- Skip to: Post Order
Re-approving multiple records at one time -
- (Assuming all necessary edits have been made)
- In Record Manager - search for Printed records and select them via the checkbox
- Under Batch Action tab, click Reprint
- Badge records will change to Approved status
- Skip to: Post Order

Posting the order
- Sort by Approved records
- Select the checkbox for all badges being requested
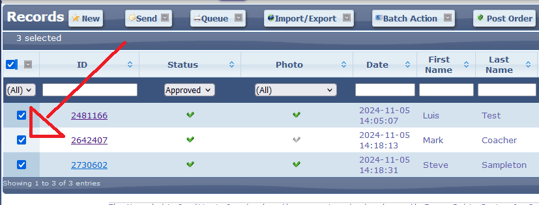
- Click the
 button
 - A window will pop up to confirm how many badges are being ordered, or it will warn if steps not done correctly.
- Click the
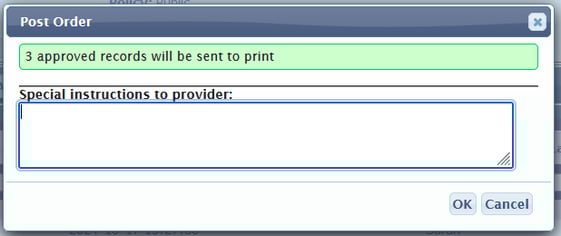
- After clicking OK - the selected 'Approved' records will then change to 'Ordered' status
- (The 'Ordered' status icon looks like this:
 )
)
- (The 'Ordered' status icon looks like this:
- Next Steps:
- The Post Order notification will now be sent to eXpress badging's production queue.
- The Post Order notification will now be sent to eXpress badging's production queue.
-
- Badge ordering user will receive confirmation of Post Order at the same moment. Please keep this email available for reference later, if necessary.
- Turnaround time information:
- We will review badge order, and print all 'Ordered' records within 1-3 business days
- We do not print badges that are not in 'Ordered' status.
- Once eXpress badging prints and processes the badge order, the 'Ordered' status will change to 'Printed'
- This means badges have shipped the same day or the next morning.
IMPORTANT:
***BADGES IN AN "ORDERED" STATUS WILL BE PRINTED.
***BADGES IN ANY STATUS OTHER THAN "ORDERED" WILL NOT BE PRINTED.