Common Uses
The TRACKING feature may be used for:
- Visitor tracking
- Event attendee tracking
- Employee checkpoint tracking
- Member or patron entry/exit tracking
- Temporary badge activity tracking
Initial Setup
To request setup of a Veonics® Portal TRACKING card group:
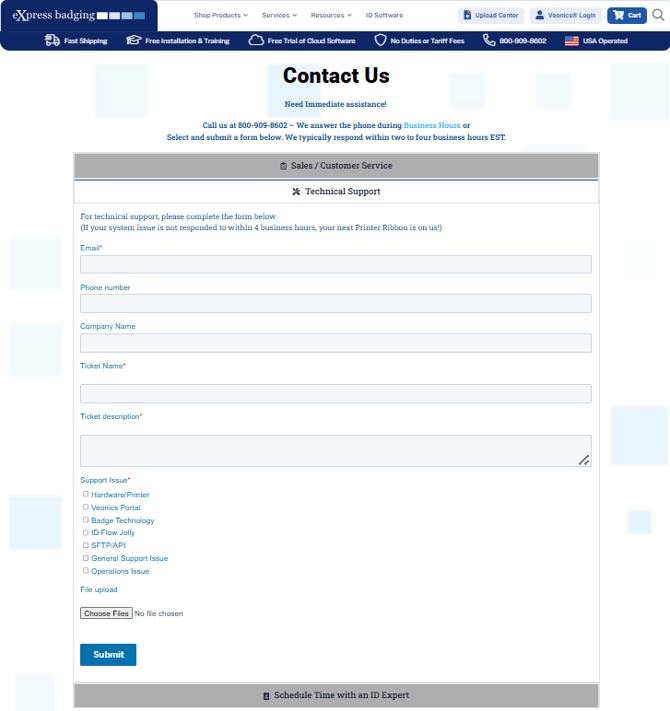
- Go to: https://expressbadging.com/contact-us/
- Scroll down to Technical Support.
- Complete the support form.
- Request that eXpress badging® create a Veonics® Portal TRACKING Card Group.
- In your request, ask our support team to create a new Record Setup for tracking.
- Recommended Record Setup
- Provide a group name such as:
- Visitor Tracking
- Event Tracking
- Tracking
- The following fields are commonly used:
- First Name
- Last Name
- ID Number
- Badge Type
- Issue Date
- Expiration Date
- Additional fields may be added depending on your organization’s tracking needs.
- Badge Template Setup
- Once the Record Setup has been created, the badge template should be reviewed or edited to support your tracking process.
- This may include:
- Confirming the correct badge layout
- Ensuring the ID number or barcode is properly placed
- Testing the barcode scanner with printed badges
- Running several sample “in” and “out” scans using different cards
- Provide a group name such as:
Issuing Badges
- Review the Record Registry (list of records) by going to Data Management, selecting Portal Track, then selecting the Record Manager button.
- Issue new ID badges to the people you need to track by using the New button.
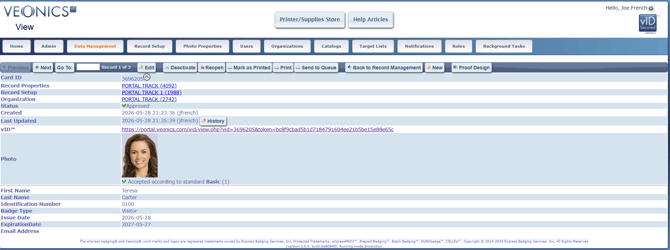
- Once a badge record is created and ready, it is important that you select the Approved button.
- Periodically, returned badges should be looked up in the Record Manager, marked as Inactive, and then destroyed or shredded in accordance with your organization’s badge-handling policy.
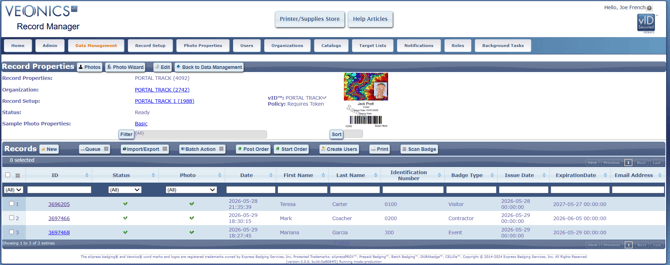
In the Record Manager, you can see the Record Registry at the bottom and scroll down as needed, or use the search boxes in each column to find a specific record if you need to edit it.
Several important columns in the Records Registry are Last Name, Identification Number, Status, Date, and Expiration Date.
- The Date field will be the most used field to sort by since it defaults to oldest first, and using newest first allows you to view the registry for the current day over time.
- Last Name or ID Number can be used for a quick search of a record
- Status is a great field if you use it after a badge has expired by editing the Record and Marking as Deactivated. From the Record Manager screen, you can then filter out all Inactive badges.
You can further drill down to the individual badge record by selecting the URL-enabled ID number within the column.
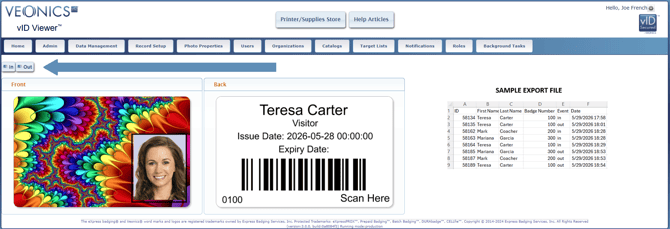
Once the badge has been issued and printed, it can be scanned using the TRACKING feature.
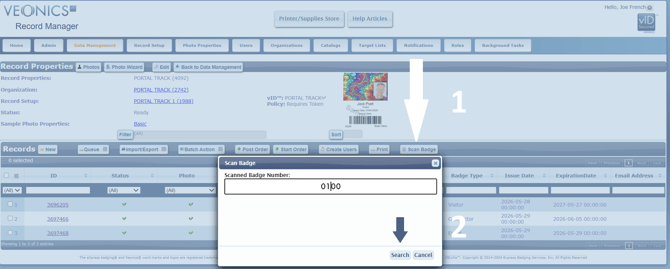
Using the Scan Badge Feature
-
From the same Record Manager:
- Enable or open the Scan Badge feature.
- Scan the person’s badge.
- Select In for the first scan or arrival transaction.
- When the person exits, scan the badge again.
- Select Out for the exit transaction.
TIPS: You will need to create a process to determine who gets an In punch and who gets an Out punch. This could be an In and Out Lane, or you may just ask a couple of simple questions.- The first In punch is evident as they are issued the badge at the same time, in most cases. Unless you provided prior to use.
- Ask a simple question, "Are you returning or leaving?"
- If they are leaving, and the expiration date is the same day ask:
- "Are you returning later today?
- If yes, they can leave with their badge.
- If no, retain their badge.
- "Are you returning later today?
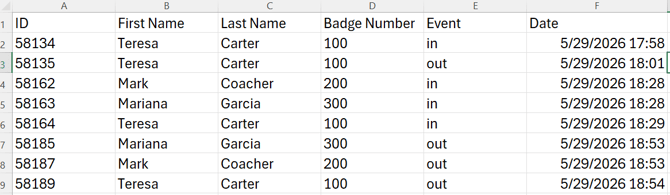
Each scan creates a transaction record in the badge scan history.
Tips:
- Create barcodes with a return built in so you do not have to manually select Search
- Once you select In or Out, close the URL Tab each time.
- Once Badge Numbers are assigned, they can not be updated
- Do not use leading zeros
Exporting Badge Scan History
-
To review the detailed in/out tracking history:
- Go to Import/Export.
- Select Export Badge Scan History.
- Select all fields using the top checkbox.
- Click OK.
- The export file will download to your computer’s Downloads folder.
The exported file may be opened in your preferred spreadsheet or imported into a database tool to review, report, or store long-term tracking data.
Recommended Best Practice
IMPORTANT: Exported scan history may contain personally identifiable information. Store exported files only in approved business locations and follow your organization’s data retention and security policies.
For ongoing tracking, we recommend maintaining a single central spreadsheet or database and appending new exports to it regularly.
This helps maintain a running history of all scan transactions in one location and makes reporting easier over time.
Important Notes
The Veonics® Portal TRACKING feature is intended for basic scan-based tracking and reporting. It is not designed to replace a full access control system, a timeclock system, an enterprise visitor management system, or a life-safety occupancy system.
For best results, test all badge templates, barcodes, scanner settings, and in/out transactions before using the feature in a live environment.